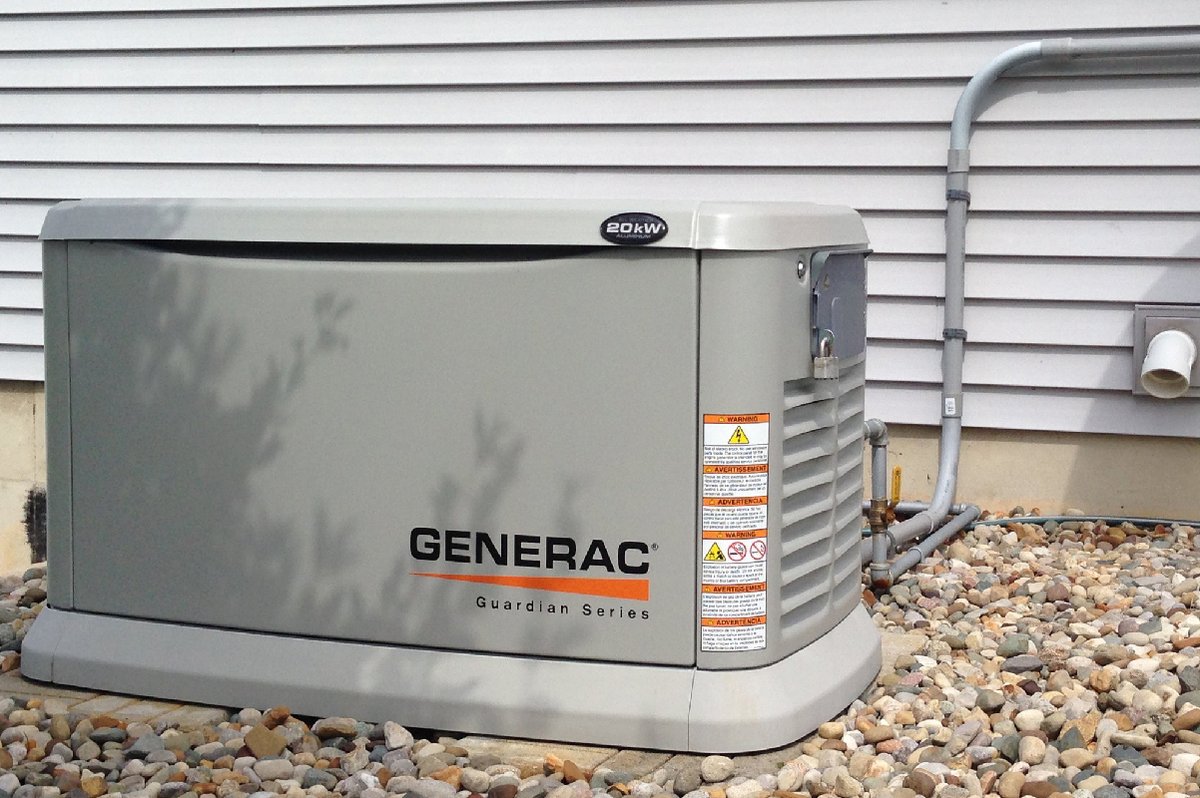
A generator is your best friend when the lights go out, but a noisy one can quickly turn into a headache, or worse, a community nuisance. If your reliable power source has started sounding more like a roaring beast than a humming workhorse, chances are it's time to tackle the DIY Installation & Replacement of Generator Mufflers. This guide will walk you through everything you need to know to silence the roar and restore peace, all while ensuring your generator runs efficiently and safely.
At a Glance: Your Muffler Replacement Roadmap
- Diagnose the Problem: Look for increased noise, visible damage, or rust on your existing muffler.
- Get the Right Part: Match your new muffler precisely to your generator's make, model, and specifications.
- Prioritize Safety: Always disconnect power, let the engine cool, and wear proper protective gear.
- Follow Torque Specs: Tighten mounting hardware to manufacturer recommendations to prevent leaks and damage.
- Check for Leaks: After installation, run the generator and inspect for any exhaust leaks or unusual sounds.
- Consider an Exhaust Extension: Learn how to safely divert fumes away from your operating area, but remember, NEVER run a generator indoors.
Why Your Generator is Screaming (And Why You Should Listen)
Imagine the quiet hum of emergency power, now picture a cacophony that makes conversation impossible. That's the difference a healthy generator muffler makes. Its core job is simple yet crucial: to reduce the noise output from your generator's engine exhaust. When this component starts to fail, you'll hear about it, literally.
A corroded, cracked, or internally damaged muffler can't do its job effectively. It means your generator is no longer just generating power; it's generating a significant amount of noise pollution. Replacing it isn't just about restoring peace and quiet; it's about:
- Reducing Environmental Noise: A new muffler significantly cuts down on the disruptive sound, making your property and your neighborhood a more pleasant place.
- Meeting Local Ordinances: Many areas have noise restrictions. A failing muffler could put you in violation, leading to complaints or even fines.
- Enhancing Comfort: Whether you're using the generator for a power outage, camping, or a job site, a quieter machine makes the environment around it much more comfortable.
- Maintaining Efficiency: Believe it or not, a damaged muffler can even affect engine performance due to improper backpressure.
So, what are the tell-tale signs you need a new muffler? Keep an ear out for increased operational noise levels that weren't there before. Visually inspect for obvious signs of corrosion, rust, cracks, or physical damage. Sometimes, you might even notice a decrease in engine performance or a change in exhaust sound that suggests internal baffling has come loose or degraded. Catching these early can save you from bigger headaches down the line.
The DIYer's Checklist: Before You Grab a Wrench
Before you dive under the hood, a little preparation goes a long way. This isn't just about saving time; it's about ensuring a safe, effective, and lasting repair.
Proper Assessment: Is Replacement Truly Necessary?
Don't just assume the muffler is the culprit. Take a few minutes to thoroughly inspect the existing component. Look for:
- Corrosion: Rust is a common enemy. If the muffler body is heavily rusted through, it's definitely compromised.
- Cracks: Visual cracks, especially near welds or mounting points, indicate a breach in the exhaust system.
- Internal Obstructions: While harder to spot externally, sometimes debris can get trapped inside, affecting performance and sound. A rattling sound might suggest loose internal baffles.
- Exhaust Leaks: With the generator running (briefly, in a well-ventilated area), look for smoke escaping from anywhere other than the tailpipe. A soapy water test can also reveal small leaks.
Confirming the damage helps ensure you're addressing the right issue and not just masking a symptom.
Component Compatibility: The Right Fit Matters Most
This is perhaps the most critical step after diagnosis. Not all mufflers are created equal. You must ensure your new component precisely matches your generator's specifications. This includes:
- Size and Dimensions: The muffler must physically fit the space and align with the existing exhaust manifold.
- Thread Type and Mounting: The way it attaches is crucial. Incorrect threads or mounting styles will lead to leaks or an inability to install.
- Backpressure Rating: This is often overlooked. The muffler is engineered to create a specific amount of backpressure, which is vital for the engine's exhaust cycle and overall performance. An incompatible muffler can lead to inefficient operation or even damage to the engine.
OEM vs. Aftermarket: What's the best choice?
While aftermarket options can sometimes be cheaper, using a replacement part from the Original Equipment Manufacturer (OEM) is generally recommended. OEM parts guarantee a precise fit, optimal performance, and adherence to your generator's warranty. If you opt for an aftermarket muffler, thoroughly verify its specifications against your generator's manual to ensure it's a true, compatible replacement.
Safety First: Your Non-Negotiables
Working with engines and exhaust systems demands respect and caution. These safety precautions are paramount:
- Disconnect Power: Always, without exception, disconnect the generator from its power source and remove the spark plug wire to prevent accidental starting.
- Cool Down Completely: Exhaust systems get incredibly hot. Give the generator ample time to cool down before touching any components. Rushing this step is a recipe for severe burns.
- Personal Protective Equipment (PPE):
- Gloves: Protect your hands from grime, sharp edges, and residual heat.
- Eye Protection: Safety glasses are a must to shield your eyes from debris, rust flakes, or accidental splashes.
- Ventilation: Even with the generator off, residual exhaust fumes can be harmful. Work in a well-ventilated area, preferably outdoors.
- Fire Extinguisher: Keep a small fire extinguisher nearby as a precaution, especially when working with fuel lines or around engine components.
Step-by-Step: Replacing Your Generator's Muffler
With your preparations complete, you're ready to get hands-on. Take your time, follow these steps, and don't hesitate to consult your generator's service manual for model-specific instructions.
1. Gather Your Tools
Before you begin, ensure you have all the necessary tools within reach:
- Socket wrench set (with appropriate metric or standard sizes)
- Screwdriver set
- Pry bar or gasket scraper (for stubborn gaskets)
- Wire brush
- New muffler
- New gaskets (if applicable, often recommended)
- High-temperature exhaust sealant (if recommended by manufacturer)
- Penetrating oil (for rusted bolts)
- Torque wrench (critical for correct tightening)
2. Disconnect and Access
- Ensure Generator is Off and Cold: Reconfirm safety steps: spark plug wire disconnected, engine completely cool.
- Locate the Muffler: Identify where the muffler connects to the engine's exhaust manifold or pipe.
- Remove Any Obstructions: You might need to temporarily remove guards, heat shields, or other components to gain clear access to the muffler's mounting hardware.
3. Remove the Old Muffler
- Apply Penetrating Oil: If the bolts look rusted or seized, spray them generously with penetrating oil and let it sit for 10-15 minutes. This can save you a lot of struggle and prevent stripping bolt heads.
- Unbolt the Muffler: Using the correct size socket wrench, carefully loosen and remove the bolts or nuts securing the muffler. Be mindful of any washers or brackets.
- Detach the Muffler: Once the fasteners are removed, gently wiggle and pull the old muffler away from the exhaust port. It might be stiff if rusted.
- Clean the Mounting Surface: Use a gasket scraper and a wire brush to thoroughly clean any old gasket material, rust, or carbon buildup from the engine's exhaust port and the mating surface of the exhaust pipe. A clean surface is crucial for a leak-free seal.
4. Install the New Muffler
- Position New Gaskets (If Applicable): If your new muffler requires a gasket, place it carefully over the exhaust port studs or against the clean mating surface. Ensure it's correctly oriented.
- Mount the New Muffler: Carefully align the new muffler with the exhaust port or pipe.
- Insert Fasteners: Thread the bolts or nuts by hand first to ensure they aren't cross-threaded.
- Hand-Tighten: Snug all fasteners by hand until they are finger-tight.
- Apply Torque: This is where your torque wrench comes in. Refer to your generator's service manual for the exact torque specifications for the muffler mounting bolts. Tighten the bolts gradually and evenly, typically in a star pattern if there are multiple, to the specified torque. Over-tightening can damage threads or the muffler itself, while under-tightening will lead to exhaust leaks.
- Reinstall Removed Components: Attach any heat shields, guards, or other parts you removed earlier.
5. Post-Installation Inspection and Test
- Reconnect Spark Plug Wire: Once everything is secured, reconnect the spark plug wire.
- Start the Generator (Outdoors): Move the generator to a safe, well-ventilated outdoor area. Start it up and let it run for a few minutes.
- Listen and Look for Leaks:
- Noise Check: Does it sound quieter?
- Visual Inspection: While the generator is running, carefully look and listen for any exhaust leaks around the muffler's mounting points. You might see wisps of smoke or hear a distinct hissing sound.
- Soapy Water Test: For subtle leaks, spray a solution of soapy water around the connection points. Bubbles indicate a leak.
- Address Issues Immediately: If you detect any leaks, shut down the generator, let it cool, and re-check the tightness of the bolts. You might need to replace the gasket or ensure the mating surfaces are perfectly clean and flat.
Beyond Noise: Managing Exhaust Fumes with an Extension
While a new muffler tackles noise, it doesn't solve the critical issue of exhaust fumes. That's where a generator exhaust extension comes in. This simple but vital accessory is a tube that connects to your generator's exhaust output, diverting noxious fumes to a safer, typically outdoor, location.
Why Use an Exhaust Extension?
- Safety First: It's about moving deadly carbon monoxide (CO) away from people and pets. CO is odorless, colorless, and lethal.
- Enhanced Ventilation: Useful when a generator is running in a semi-enclosed outdoor area like a carport or under an awning.
- Improved Comfort: Keeps fumes away when you need to be working or spending time in proximity to the running generator.
- Compliance with Local Regulations: Some situations might require exhaust redirection for safety or environmental reasons.
DIY Tools & Measurements for an Exhaust Extension
This is a straightforward project requiring minimal tools:
- Tools:
- Tape measurer or ruler
- Screwdriver (flathead or Phillips, depending on your clamp)
- Small socket wrench (if using a socket-style hose clamp)
- Hose clamp or pipe clamp (ensure it's heat-resistant and durable)
- Flexible metallic tubing (e.g., corrugated exhaust tubing or dryer vent tubing, but ensure it's rated for exhaust temperatures)
- Measurements:
- Exhaust Output Diameter: Carefully measure the outer diameter of your generator's exhaust pipe. Crucially, add about a quarter of an inch (0.25 inches) to this measurement when selecting your tubing. A slightly larger tube can be clamped tighter for a secure, leak-proof fit.
- Exhaust Tube Length: Determine this based on your generator's usual placement and where you want to safely redirect the exhaust. Ensure it's long enough to reach well away from windows, doors, and occupied areas.
Installation Steps for an Exhaust Extension
- Acquire Your Materials: Based on your measurements, get the appropriate flexible tubing and a strong, heat-resistant clamp.
- Position the Clamp: Slide the hose or pipe clamp over one end of your flexible tubing.
- Attach to Generator: Carefully fit the tubing over the generator’s exhaust output pipe. The extra 0.25 inches in diameter will allow it to slide on smoothly but still provide a snug fit.
- Secure the Clamp: Slide the clamp from the tubing onto the combined generator exhaust output and the flexible tube. Using your screwdriver or socket, securely tighten the clamp. Ensure the pipe is firmly attached and the clamp does not move or feel loose. A loose connection will leak fumes.
- Position and Secure the Extension: Direct the flexible tube to where you want the exhaust to vent. It's vital to secure the end of the exhaust pipe to prevent it from curling inwards, shifting in the wind, or redirecting exhaust back into an unsafe area. Use zip ties, stakes, or weights if necessary to hold it in place.
Disassembly Steps
When you're done using the generator, removing the extension is simple:
- Ensure the generator is off and completely cool.
- Unhook or loosen the clamp from the generator's exhaust output.
- Carefully remove the flexible pipe.
- Store all parts together (tubing, clamp) in a clean, dry place for future use.
CRITICAL SAFETY WARNING: Exhaust Extensions and Indoor Use
This is not just a recommendation; it's a matter of life and death.
NEVER run a generator indoors, even with an exhaust extension attached.
- Carbon Monoxide is a Silent Killer: Carbon monoxide (CO) is an odorless, colorless, and deadly gas. Even with an extension, exhaust pipes can disconnect, or fumes can leak from connections, cracks, or even through porous materials.
- Incomplete Diversion: No DIY exhaust extension can guarantee 100% capture and diversion of all CO.
- Fatal Consequences: Operating a generator indoors or in any enclosed space, including garages, sheds, basements, or partially open structures, can lead to fatal carbon monoxide poisoning within minutes.
Always operate generators outdoors in a well-ventilated area, clear of flammable materials, and away from windows, doors, and vents that could allow exhaust to enter occupied buildings. Consider installing battery-operated CO alarms in your home for an added layer of safety.
Keeping It Running Right: Long-Term Muffler Care
Replacing your generator's muffler is a significant step, but it's part of a larger picture of proper maintenance. A proactive approach ensures not only the longevity of your new muffler but the overall health and efficiency of your generator.
Regular Maintenance: A Schedule for Sound Performance
Implement a routine inspection schedule for your generator's exhaust system. This doesn't need to be complex; a quick visual check can go a long way.
- Visual Checks: Before and after each extended use, quickly inspect the muffler and exhaust pipe for signs of corrosion, dents, cracks, or loose connections.
- Sound Checks: Pay attention to any changes in the generator's operating sound. An increase in noise or a rattling sound could signal internal damage or a developing leak.
- Gasket Integrity: If accessible, check the muffler's mounting gaskets for signs of wear or cracking.
Early detection of issues prevents them from escalating into costly repairs or efficiency problems.
Lifespan and Influencing Factors
How long can you expect your new muffler to last? It varies, but several factors play a role:
- Usage Frequency: A generator used daily will naturally wear out its muffler faster than one used only during occasional power outages.
- Environmental Conditions: Generators operated in corrosive environments (e.g., near saltwater, in high-humidity areas, or places with road salt in winter) will see accelerated corrosion and a shorter muffler lifespan.
- Material Quality: OEM mufflers generally use materials and construction designed for the specific generator, often leading to better durability than some cheaper aftermarket alternatives.
- Vibration: Excessive vibration from an imbalanced engine or loose mounting can stress the muffler's welds and internal baffles, shortening its life.
Regular inspection and maintenance are key to extending the durability of your muffler.
The Impact of Neglecting Key Aspects
Cutting corners or ignoring warning signs with your generator's muffler can lead to a cascade of problems:
- Degradation: If you fail to identify component degradation early, you're looking at increased noise pollution (leading to community complaints and potential legal repercussions), reduced generator efficiency (due to increased backpressure and poorer fuel economy), and serious safety risks from toxic exhaust gases leaking into the environment.
- Improper Installation: Shoddy installation techniques are a direct path to non-compliance with noise regulations, fines, and engine inefficiency. Exhaust leaks mean diminished engine performance, increased fuel consumption, and premature wear on the new component.
- Compatibility Issues: Installing an incorrect muffler (wrong dimensions, thread types, or materials) can cause devastating consequences: severe exhaust leaks, ineffective noise suppression, direct engine damage, reduced performance, and even increased fuel consumption. In the worst case, it can lead to costly repairs, operational downtime, and potentially void your generator's warranty.
- Exhaust System Integrity: The muffler isn't an isolated component. Its performance is intrinsically linked to the entire exhaust system. Replacing the muffler without addressing underlying issues like corroded exhaust pipes, loose connections, or cracked manifolds will result in suboptimal noise reduction, reduced engine efficiency, and accelerated wear on your brand-new muffler. Always inspect the entire system when working on the muffler. For a deeper dive into how these components work together, consider understanding generator mufflers as a whole system.
Adjustments to Other Components
Generally, a straightforward muffler replacement is self-contained. However, it's always advisable to inspect the entire exhaust system for other potential leaks or damage. While rare, significant changes in exhaust backpressure (which an incompatible muffler could cause) might, in some generators, necessitate minor carburetor adjustments to maintain optimal fuel-air mixture. This is typically an advanced troubleshooting step; if you suspect this, consulting a qualified technician is recommended.
Your Top Questions Answered About Generator Mufflers
You've got questions, we've got straightforward answers.
1. What are the tell-tale signs I need a new muffler?
The most common indicators are a noticeable increase in your generator's operational noise, visible signs of corrosion, rust, or physical damage (like cracks or dents) on the muffler's exterior, and sometimes a decrease in engine performance or fuel efficiency. You might also hear rattling sounds, suggesting internal baffling damage.
2. Should I go OEM or aftermarket for a replacement?
While aftermarket options can offer cost savings, using an Original Equipment Manufacturer (OEM) part is generally recommended. OEM mufflers provide the precise fit, backpressure rating, and material quality designed specifically for your generator, ensuring optimal performance and maintaining warranty adherence. If you choose aftermarket, rigorously verify its specifications against your generator's requirements.
3. What are the biggest safety risks when doing this DIY?
The primary safety hazards are burn risks from a hot engine and exhaust system, and carbon monoxide (CO) poisoning from exhaust fumes. Always allow the engine to cool completely before starting work, disconnect the spark plug wire to prevent accidental starts, and work in a well-ventilated area. Never run a generator indoors, even with an exhaust extension.
4. Do I need to be a pro mechanic to do this?
A mechanically inclined individual with some basic knowledge of engine and exhaust systems, and proper tool usage, can typically undertake this procedure. However, if you are unfamiliar with such tasks or uncomfortable working with power equipment, it is highly advisable to consult a qualified technician. Improper installation can lead to exhaust leaks, engine damage, and safety risks.
5. How long do generator mufflers typically last?
The lifespan of a generator muffler varies significantly based on usage frequency, the environmental conditions it operates in (e.g., corrosive environments like coastal areas or high humidity shorten life), and the quality of the materials. Regular inspection and maintenance are key to extending its durability, while excessive vibration or neglect can shorten it.
The Bottom Line: Quieter Power, Safer Operation
Replacing your generator's muffler might seem like a small task, but its impact on performance, noise, and safety is anything but. By following these comprehensive steps, prioritizing safety, and ensuring you have the right parts, you're not just fixing a component; you're investing in the longevity and reliable operation of your power source. A properly maintained generator is a quieter, more efficient, and ultimately, safer asset, ready to serve you faithfully when you need it most. Embrace the DIY spirit, and enjoy the peace and quiet of a generator that works as it should.